Transform Image URLs with a Simple Cloudflare Worker
Cloudflare Workers make it easy to quickly transform HTML on the fly with no third-party dependencies. Let's show how smooth the process is by building one to prepare every image URL for use with PicPerf.io.I've been working on PicPerf in some capacity for about a year now, and I'm still really happy with its API for optimizing, reformatting, and caching images: prefix the URLs with https://picperf.io.
But on a number of platforms, that's not so simple. Images are often handled by a proprietary system, with no means of changing those URLs. That's unfortunate because many of those platforms don't have a sophisticated optimization pipeline built out. Squarespace, for example, will auto-generate sizes, but won't convert images to more optimal formats like WebP or AVIF. Others might, but they'll set underwhelming cache headers, which isn't great for repeat visitors.
This is exactly the kind of problem best solved by a Cloudflare Worker. We can transform HTML (like images tags) on the fly, at the edge, and with no dependencies. And all in ~60 lines of code. Oh, and entirely on Cloudflare's free tier.
Let's walk through it.
Getting Set Up
To get started, you'll need an active zone set up for your domain. The most common (and easiest) way to do that is to have Cloudflare fully manage your DNS (it's free). Then, just make sure the "proxied" toggle is enabled.
I'll be using a subdomain for demonstration. It points to a single index.html file hosted with Vercel, but it'll work with any other platform you're using too. Vercel enables custom domain usage via CNAME, so my DNS record looks like this:

Here's that HTML.
<!DOCTYPE html>
<html lang="en">
	<head>
		<title>Example Site</title>
		<style>
			#otherBlock {
				background: url(https://macarthur.me/me.jpg);
				height: 300px;
				width: 300px;
			}
    </style>
</head>
<body>
	<img src="https://macarthur.me/me.jpg" alt="me">
	<div style="background: url(https://macarthur.me/me.jpg); height: 200px; width: 200px;"></div>
	<div id="otherBlock"></div>
</body>
</html>
It's simple, but it's all we need to verify both image elements and CSS background images are handled correctly.
Creating a New Worker
Let's now create that worker. At the top level of your Cloudflare account, find the "Workers & Pages" link on the left sidebar, click "Create Application," and then the "Create Worker" button. If you did things right, you'll land on a page containing a basic, starter worker:
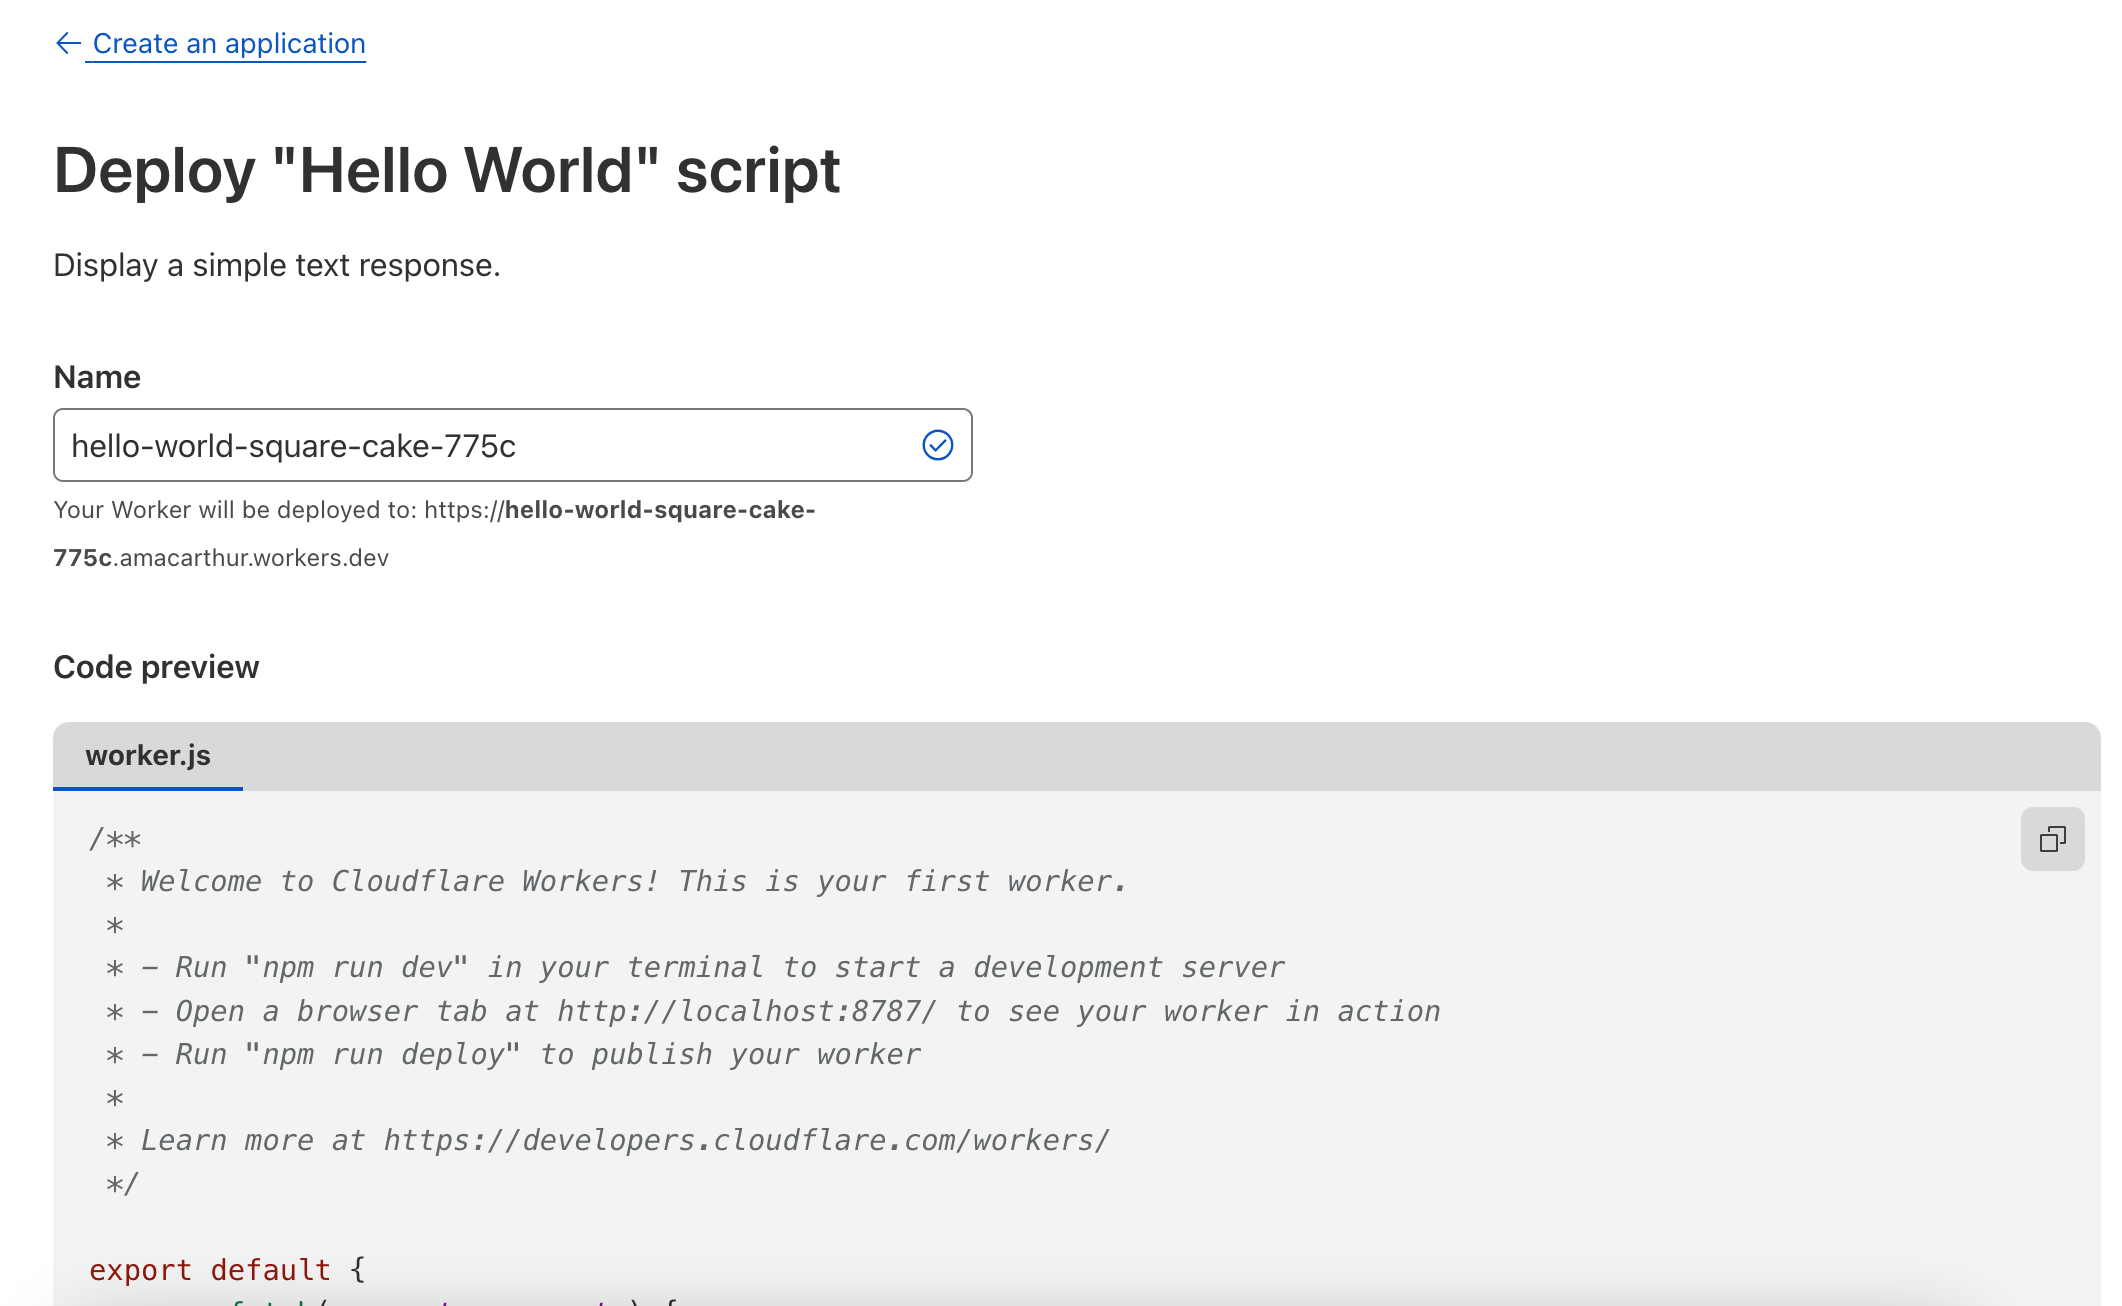
Leave it as it is and deploy it for now. You'll see a preview link, and when it's clicked, you should see "Hello World!" rendered to the screen.
Intercepting Requests
Next up, let's make our worker sit in front of every request to our site, so it can eventually modify its HTML. We'll use a route rule to do this.
Navigate to your worker's overview and select the "Triggers" menu item. If you scroll down to "Routes," you'll see your newly created worker:

Add a new route that uses wildcards to cover every request path that might hit the domain you're targeting.
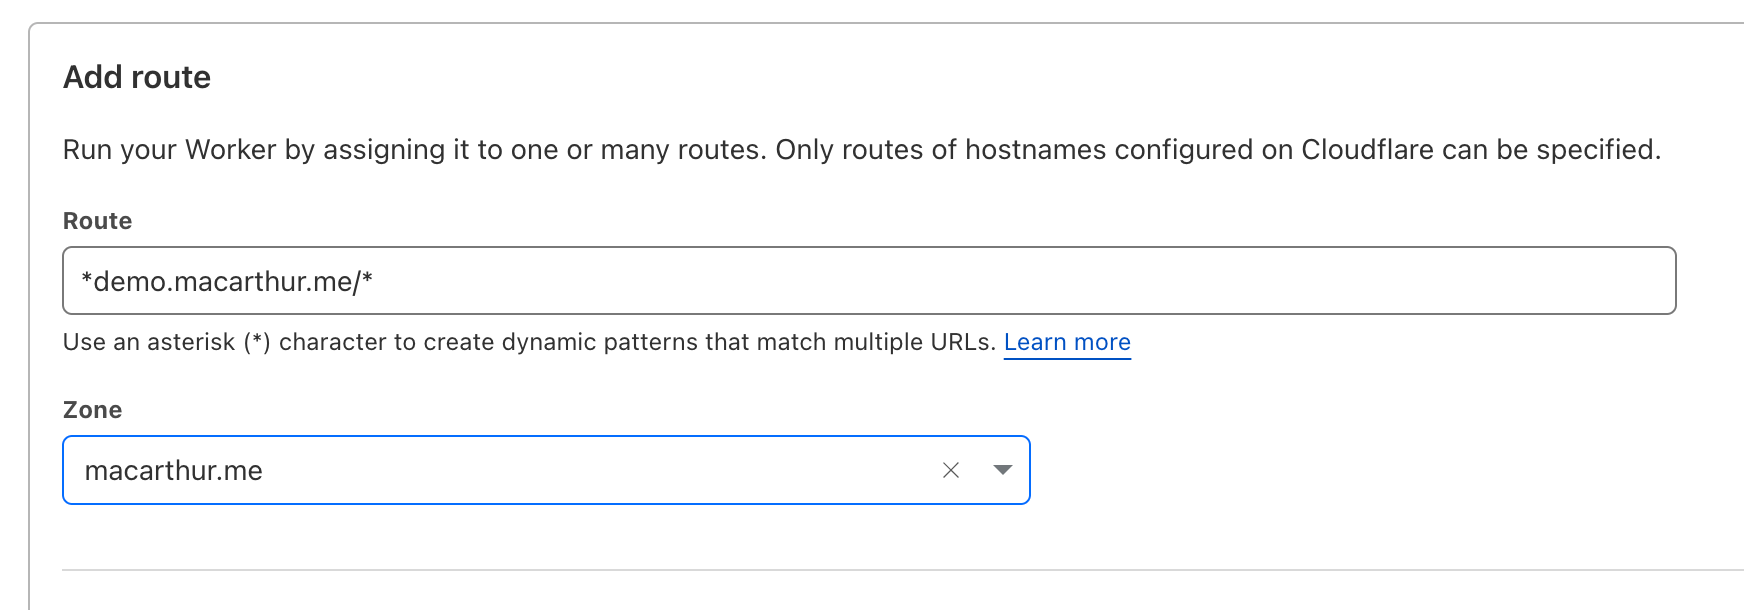
With those wildcards in place, it'll match on every request, allowing us to always intercept & manipulate HTML like we intend.
Handling Incoming Requests
This is where things get fun. The code in our worker just spits back a dumb Response. Let's start upgrading it by returning the HTML that would've been returned without our worker.
We'll be doing all these changes in the browser. Find the "Quick edit" button and you'll have a pretty decent editing & debugging environment without needing to set up anything locally.
Let's use fetch() to intercept and immediately return the response.
export default {
	async fetch(request, _env, ctx) {
    return fetch(request);
};
After deploying that and navigating to the URL, you should see that nothing has changed. The exact same response is being returned. It's just a catch & release.
Rewriting HTML
We're now ready to rewrite our image URLs, and thanks to a primitive provided by Cloudflare, it's extremely easy to do. We'll use the HTMLRewriter class, allowing us to grab elements with familiar CSS selectors and manipulate them as desired.
Let's update worker to return the transformed result of that rewriter using the handler we'll create in a second:
export default {
	async fetch(request, _env, ctx) {
		const response = await fetch(request);

        // Using `let` for a reason. Stay tuned.
		let transformedResponse = new HTMLRewriter()
			.on("*", new ElementHandler())
			.transform(response);

        return transformedResponse;
  },
};
And here's that handler. We're only interested in elements, so it'll be pretty slim:
const prefix = "https://picperf.io";

class ElementHandler {
  element(element) {
    for (const [name, value] of element.attributes) {
      if (name === "src") {
        element.setAttribute("src", `${prefix}/${value}`);
      }
    }
  }
}
The element's attributes are exposed as an iterator that can't be individually accessed by key, so we'll use a for loop to check for the src attribute, after which we slap in our prefix.
Save that, and we'll now see our single image prefixed correctly:
Handling Inline CSS
It's common for background images to be set by a CMS as inline style attributes, so let's upgrade our worker to transform them too. Let's add the following function to our worker. It'll replace every url() in a string of CSS with the prefixed version.
function prefixCssUrls(cssString) {
	return cssString.replace(/url\((.*?)\)/g, (match, url) => {
		if (!url.startsWith(prefix)) {
			return `url(${prefix}/${url.trim()})`;
		}

		return match;
	});
}
And then we can add another section to our ElementHandler:
class ElementHandler {
	element(element) {
		for (const [name, value] of element.attributes) {
			if (name === "src") {
				element.setAttribute("src", `${prefix}/${value}`);
			}

+			if (name === "style") {
+				element.setAttribute("style", prefixCssUrls(value));
+			}
		}
	}
}
The HTML's now looking even better:
Don't Forget About Style Tags
Some of those background images may be defined via <style> tags, so let's make sure we account for those too. We're no longer strictly dealing with attributes now (we want to transform the content of a tag), so we'll need to create a distinct handler.
In the root of our worker, let's instantiate another HTMLRewriter, this time using a style selector:
export default {
	async fetch(request, _env, ctx) {

        // ...our ElementHandler here...

		const transformedResponse = new HTMLRewriter()
			.on("style", new StyleHandler())
			.transform(transformedResponse);

		return transformedResponse;
    }
}
And that StyleHandler will also be slim, reusing the prefixCssUrls() function we made earlier:
class StyleHandler {
	text(chunk) {
		chunk.replace(prefixCssUrls(chunk.text));
	}
}
After deploying that change, the background URLs embedded within <style> tags are now correctly prefixed:
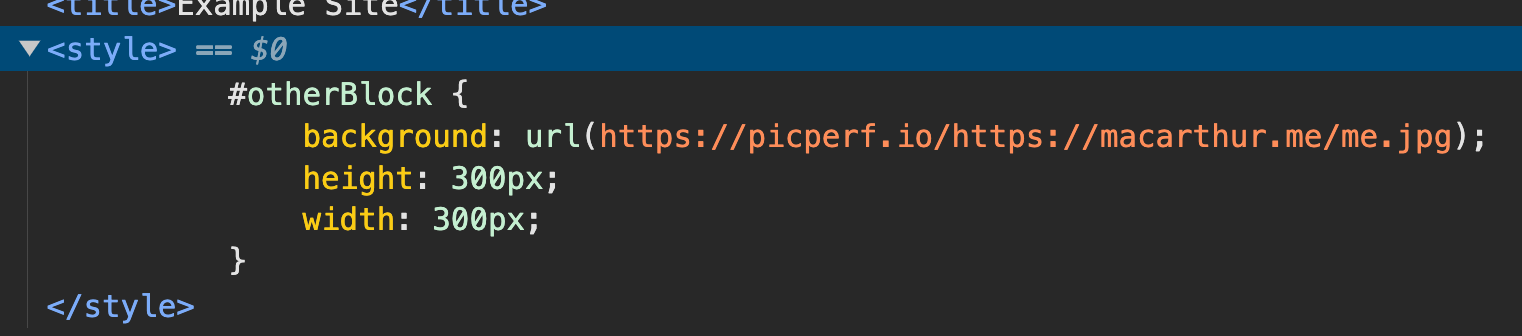
That should cover the bulk of the images embedded directly in our HTML. But there's something we can do to optimize performance a little more.
Caching a Page's Transformations
Everything happening here executes quickly at the edge, but Cloudflare offers a nice caching API to optimize even further. We'll use it to perform transformations only if we don't have a cached version of that same request already available. There's no need to import or anything else – it's available on the caches global variable. We'll be using the default cache, but you're welcome to create your own as well.
Zooming in on the root worker handler again:
export default {
	async fetch(request, _env, ctx) {

	// Transform HTML & save to `transformedResponse` variable...

		ctx.waitUntil(caches.default.put(request, transformedResponse.clone()));

		return transformedResponse;
    }
}
A few notes on that:
- That
ctx.waitUntil()is important, letting us asynchronously do work without blocking the worker's response. - The key our cached response is the request itself. You could also use the URL, but this is a little cleaner.
- It's important to
.clone()our response because it can only be read once. If you don't, you'll get aTypeErrorthat says something like this: "Body has already been used. It can only be used once."
Of course, after that's in place, you can start returning the cached version of the request when it exists:
export default {
	async fetch(request, _env, ctx) {
+		const cachedResponse = await caches.default.match(request);
+
+		if (cachedResponse) {
+			return cachedResponse;
+		}

		// Transform HTML & save to `transformedResponse` variable...

		ctx.waitUntil(caches.default.put(request, transformedResponse.clone()));

		return transformedResponse;
    }
}
The worker cache API will respect the Cache-Control headers of the response you're caching. If you'd like to tweak how it behaves, you'd need to create a new response with the particular header's you'd like it to use.
Just to Cover Your Butt...
We're in a good place, but there are a couple things I'd recommend doing before calling it done.
First, if you're concerned that something terrible could happen in the transformation process, stick ctx.passThroughOnException() at the beginning of your worker's handler. When any exception is thrown, it'll fall back to getting a response directly from your origin server.
export default {
	async fetch(request, _env, ctx) {
		ctx.passThroughOnException();

		// Other stuff...
    }
}
And second, limit all this work to the GET HTTP method. The only place this work is useful is when a user views HTML in the browser, and that's a GET.
export default {
	async fetch(request, _env, ctx) {
		ctx.passThroughOnException();

+		if (request.method !== 'GET') throw new Error("Not a GET!");

		// Other stuff...
    }
}
Thanks to the ctx.passThroughOnException() line we just added, throwing that error will pass other HTTP method requests through to origin without trying to process them.
Tweak as Needed
The full implementation is nice & short – less than 60 lines. If you'd like to see it, I wrapped it up. Feel free to pull it down and adjust as needed.
Once it's deployed in your account, you're set for a while. Cloudflare provides a generous free tier for its workers. If you do stick with PicPerf, however, just make sure you register your domains after creating an account. If you don't, you won't be able to reap the performance benefits.
Hope some of this was helpful!

Alex MacArthur is a software engineer working for Dave Ramsey in
Nashville-ish, TN.
Soli Deo gloria.
Get irregular emails about new posts or projects.
No spam. Unsubscribe whenever.